home for-sale how-we-build crokinole crokinole-gallery about-us
Next pageI am ready to attach the rails. The rails go on in two overlapping rings. The outside circumference of the board is about 1" under 8’, so two 4’ rails will make one ring. If I have not done so already, I sand and stain the rail side that will face the ditch because it is much easier to do it now then later, and I won’t have a problem with staining wood marred by glue. I will use glue and 1/2" tacks to attach the inner ring.
In the past, we have made rails by bending 1/4" boards. To get them to bend, we would soak them overnight in water. This was unpleasant work. I have also made rails from 1/8" birch plywood (non-airplane grade), which I found in a craft store. For the outer ring, I have used 2" wide, iron-on veneer.
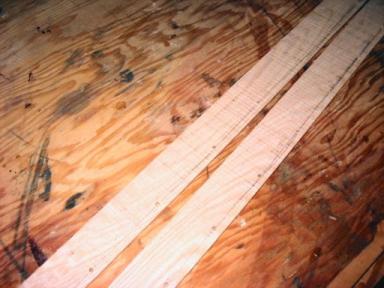 I begin by drawing a line on the outside of each inner rail that is 1/4" from the bottom
edge. I then drill holes along the line 2-3" apart but not within the last 2"
at either end. The diameter of the holes must be big enough so that the tacks slip
easily into them without binding but without falling through.
Too-small holes will cause the wood to split when I pound in the tacks.
I begin by drawing a line on the outside of each inner rail that is 1/4" from the bottom
edge. I then drill holes along the line 2-3" apart but not within the last 2"
at either end. The diameter of the holes must be big enough so that the tacks slip
easily into them without binding but without falling through.
Too-small holes will cause the wood to split when I pound in the tacks.
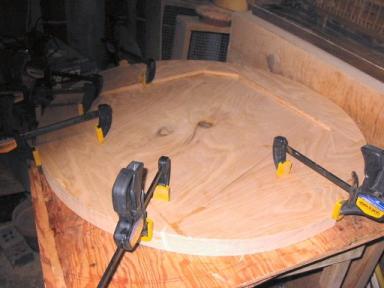 I flip the board upside down, and I dry-mount an inner rail with clamps.
To make this easier, I put some scrap wood and newspaper under the board so that
when I put the rail against the edge, it sits flat on the table and is even
with the base. I then mark the base on each end where the rail ends.
I remove the clamps and wipe a line of wood glue on the base from line to
line. I then quickly reassemble the board, rail, and clamps as I had them a
moment ago.
I flip the board upside down, and I dry-mount an inner rail with clamps.
To make this easier, I put some scrap wood and newspaper under the board so that
when I put the rail against the edge, it sits flat on the table and is even
with the base. I then mark the base on each end where the rail ends.
I remove the clamps and wipe a line of wood glue on the base from line to
line. I then quickly reassemble the board, rail, and clamps as I had them a
moment ago.
 I nail in the tacks either by working from center out or from one end to another.
The tacks are too small for my fingers, so I hold them square with needlenose
pliers. I remove clamps if they are in the way. I do not put tacks in the last
2" at either rail end because I find it is too easy to split the rail,
so I rely on glue to hold the ends in place.
I nail in the tacks either by working from center out or from one end to another.
The tacks are too small for my fingers, so I hold them square with needlenose
pliers. I remove clamps if they are in the way. I do not put tacks in the last
2" at either rail end because I find it is too easy to split the rail,
so I rely on glue to hold the ends in place.
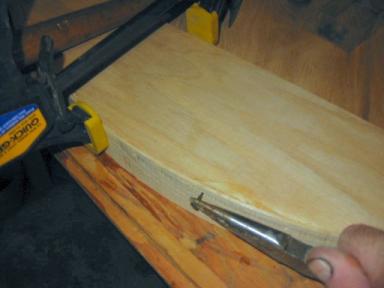
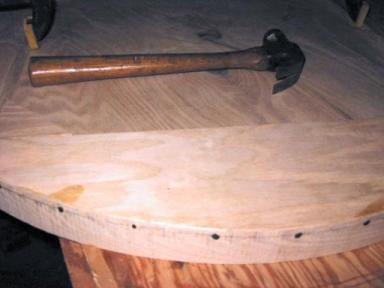 I have finished attaching one inner rail. The rails are very delicate at
this point, so I handle them with extreme care. Do not carry the board by the rail!
Even with care, I split rails. If the split is only a inch or two,
I leave it as is and cover it up with sandpaper and finish
later after I attach the supporting outer rail. Once I did drop a board,
splitting a rail almost its entire length, and then I had to pry it off and put
on a new one, but that was only once.
I have finished attaching one inner rail. The rails are very delicate at
this point, so I handle them with extreme care. Do not carry the board by the rail!
Even with care, I split rails. If the split is only a inch or two,
I leave it as is and cover it up with sandpaper and finish
later after I attach the supporting outer rail. Once I did drop a board,
splitting a rail almost its entire length, and then I had to pry it off and put
on a new one, but that was only once.
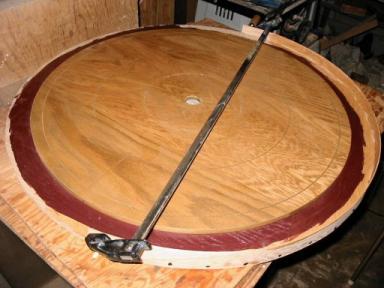 I flip the board over, and I wipe out squeezed-out glue. I apply some more glue to the
rail ends to get better contact. I then use a long clamp to hold down the rail ends.
I also look for any gaps between the rail and the base, and I either add more tacks or more
glue and clamps to tighten the fit.
I flip the board over, and I wipe out squeezed-out glue. I apply some more glue to the
rail ends to get better contact. I then use a long clamp to hold down the rail ends.
I also look for any gaps between the rail and the base, and I either add more tacks or more
glue and clamps to tighten the fit.
I attach the second inner rail using the same procedure as the first rail. The one difference is that I must trim off about an inch to fit the second rail. When I dry-mount the second rail, I mark where I need to cut. I then attach the second rail.